Brinton Hall, Fabric, and Anna Brereton

Good Saturday morning from South Texas – where we love the 100+ degree weather and humidity….. OK – July Fool!  They “say” we are sending the heat high to the Southwest next week – around 1 August!  If that happens and we have rain in August we are in a new cycle of weather!   Walking in this weather is great – allows me to take at least 2 showers a day!  I will miss them when winter gets here (LOL).

Our lives have returned to normal (with a few sad moments) it is unbelievable what stress can do to the body and mind – it is a killer.  I am so enjoying life again and my freedom from interruptions and other issues.  Now the only interruptions are when Clay and I interrupt each other when we are working on our projects!  Looking forward to the trek to Arizona more and more.  So many things coming down the road that are exciting and so looking forward to the change in scenery.   The word for August is “Concentration” because I am slowly getting it back!

Well, here is an update on the Brinton Hall quilt.  When I received my Quiltmania, #108, and started reviewing Part 2 of the project, I decided to look further into this quilt.  Evidently the quilt was inspired by an original piece made between 1803-05 by Anna Brereton who lived from 1756-1819!  WOW!  Can you imagine if the quilters of today will have their work copied, or new interpretations of them in the year 300?  Wonder if anyone will still be on this old earth by then!

As I began to review Part 2, I wanted to learn more about the original quilt and quiltmaker.  Here is a picture of the original quilt – it is absolutely beautiful – what a bed to die for!   Janet Rae has a book that was published in 1987 on “The Quilts of the British Isles” where Leigh Latimore found this quilt and made her interpretation using Kaffe Fassett fabrics and Reproduction fabrics.  (I found the book on Amazon and ordered it as it should be a good read).   It is a pretty quilt, but of course we all are individuals in our color/fabric selections and that is what makes Quilters unique!  They bring their own preferences in fabric and color when making a quilt.  This is what makes our hobby unique!   This quilt is an absolute work of art.  If you wish to know more click on this link – Frayed Fabrics

Original Quilt by Anna Brereton

There are 2 other Bloggers (USA) who are working on the Brinton Hall quilt project – LuAnn and Karen H.  PS – Thank you Karen for the tip on the ‘hyperlink’  you saved me some time in learning that one!

So on to my progress.  I am currently working on cutting out a million hexagons (not really) for this quilt.  I have all of the tone on tone fabric hexies cut and working on them in the evening. Now I need to cut more for the remainder of the Medallion.   I love pulling fabrics and cutting them up into pieces – weird huh?  When I saw this pattern I immediately went to my Asian fabric stash, that has been sitting patiently waiting for at least 7 years, and of course my batiks (they have missed me since I went back 200 years to Reproductions) to select my favorite colors that will blend nicely with the Asian.

After reviewing Part 1 and 2 of Brinton Hall from Leigh Latimore I have decided that I will continue on with the Medallion, but after that I have a new interpretation of Anna’s quilt.   I used EQ7 yesterday and designed the quilt – at least I think I know where I am going with this.  I should have better control over the outcome than I did on my previous disaster – Enduring Legacy!

Here are some of the fabrics (first pull) that I will be using!  I am really excited about working on this and it seems I am developing a love for EPP – need to with all the money I have invested in Paper Pieces  and Stamps by Kate products!

Asian Fabric for Brinton Hall
Asian Fabric for Brinton Hall (Upside down bird) Notice the hexies on the top fabric background!
Batiks for Brinton Hall
Hexie Flower
Test Hexie Flower

To shift gears…. I think it was during April that I went absolutely nuts on purchasing two (2) old Singer sewing machines – First I purchased this Singer 301 and then purchased the table that it sits on!  Of course during the course of that purchase I heard about the Singer 401a and what a workhorse it was!  So I purchased one of those.  I will tell you that I have not taken the time to sew a lot on the 301, but I can attest to the soundness and what a workhorse the 401a is.  I was blessed in purchasing to fantastic machines – both in perfect looks and perfection in performance.
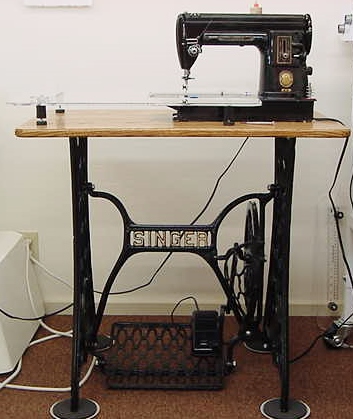
Singer 301
Singer 301 sitting on a special made table made from a Singer Treadle Machine

I hope that everyone has a wonderful week-end of quilting while we are in the heat of Summer!  Good time to work on UFO’s or new projects.  Until next time – take care and have a blessed life.  I do!
Clarification on Hexigon Crowns for Brinton Hall

On my previous post, I talked about how I clipped the hexi’s to my template.   After doing this I then sewed the Hexi Crown together before I appliqued it to the 10 1/2″ block.

I tried to put them together looking at the pattern, but kept making mistakes by sewing the wrong edges together,  so for me this was a way that I could pick up the first 2 hexagons, sew them together, then add the next one, etc, without making errors.

After the Hexi Crown was sewn together, I placed it around the block where I had drawn a line and then ran a basting thread to use as a placement guide on the right side of the 10 1/2″ block.   I pinned the Hexi Crown to the block and then did the applique.    This process really helped me.

Karen H (faeriesandfibres@blogspot.com) really helped get started on this project and is very helpful.  Bloggers are so very very helpful with their tutorials.

Have a great week.

Brinton Hall – a Labor of Love – from a Quilting Nut!

Well, we are still in the wonderful summer time in South Texas.  The heat high will just not move….. We are experiencing 100’s by 4 PM and in the morning it is 77 with high humidity.  The pretty green grass is slowing turning to a light green and without rain will, of course die off again.  But we are lucky – at least the hot summer days did not start until the 10th or so of July rather than the 1st of June!

Brinton Hall and I have been the best of buddies since last week.  I have finished all of the “flowers” for the Medallion and am just thrilled with the outcome.  As I worked on the 7 blocks – I found that by spraying the center fabric with some sizing and pinning the “crowns” onto the fabric that it was a little easier to applique.  The fabric was easier to control (no wrinkles) by using the sizing and pressing the freezer paper to the back side of the fabric.

Backside with Basting Stitches and FP Template Stabalizer
Backside with Basting Stitches and FP TemplateStabilizer

Here is another trick that I found to be a time saver  – mainly because the Hexies have to be in the correct placement or one may mess up (OK this step was a necessity for me once I messed up 2 and had to “rip” them out and re-sew).  Not fun with those tiny stitches!  I used the template that I made to “fussy cut” the 10 1/2″ blocks.  This worked great by placing the Hexie’s on the outside.   I used non-stick tape so the hexies would stay put.

Crown Setting
Crown Setting

Then I used the clips to hold each Hexie in place before sewing the crown.

Hexie Crown Placement for Sewing

Here they are – enjoy!  I know I am a tired, but happy camper this afternoon.  To be able to complete this in a week is great.  The rest of the work will be done at night and tomorrow I will be cutting out the remaining 300 + hexagons to complete the Medallion – Boy I certainly hope Quiltmania #108 doesn’t get here until August…. (LOL).  Here are the finished blocks on the design wall with a few of the “white” hexies around the Green Crown.

Brinton Hall Quilt 2015
Brinton Hall Quilt Medallion Flowers

And here are pictures of the individual blocks.

Purple Crown
Purple Crown
Pink Crown
Pink Crown
Maroon Crown
Maroon Crown
Liliac Crown
Liliac Crown
Block 1 of Brinton Hall Medallion
Green Crown
Gold Crown
Gold Crown
Yellow Crown
Yellow Crown

This quilt will not be one to just “breeze” through.  It is a wonderful challenge quilt that my Carpel Tunnel and Dorsal Wrist will remember for a long time! (LOL).   It will definitely be entered into Quilt Shows starting in 2016.  Cutting the fabric was not a time consumer, but preparing and sewing the Hexagons and Hexie Crowns were slow and time-consuming — at least I thought they were until I started appliqueing the Crowns to the block!   Just to applique the Hexie Crown on to the 10 1/2″ square took 1 (one) hour per block.  I did not count all the hours, but I have not stopped working on this project since last Thursday to finish the remaining 6 blocks.

PS – Of course while looking at Karen’s blog yesterday (http://faeriesandfibres.blogspot.ca) she showed a quilt called Gardens of a King, a pattern that she tested for Missie Carpenter of Traditional Primitives. The pattern is now available from her shop.  (http://traditionalprimitives.com/).   I think I may really be nuts if I decide to order this pattern, but the quilt really caught my eye.  Missie is very easy to contact if you have any questions regarding the quilt.  So pretty!

Creativity Is Back Thanks to Brinton Hall!

Good afternoon and welcome to the 100 Weather Club here in beautiful South Texas – Time for those Summer Doldrums.  Time to stay in the 70’s with the A/C running at full blast.

I started Brinton Hall Quilt (Quiltmania #107) this week.  Lu Ann (Loose Threads Blog) inspired me to make this quilt and become more proficient with English Paper Piecing (EPP).  I really am enjoying Diane Gilleband’s book – what a find!  (Thx again LuAnn) What fun I am having with this project. I want to share the process I am using to make the center Blocks because most patterns in magazines leave out a lot of information.    The greatest thing about the Blogging world is the inspiration that we received from the Quilt Bloggers.

For my quilt, I  decided to use a beautiful Asian print that I had purchased years ago and had just enough to fussy cut the 7 – 10 1/2″ squares.  (Batiks will be used for the hexies in the Medallion).   I placed my template on the right side of each 10 1/2″ square and marked the fussy cut blocks with my applique pencil.  I did NOT trim the excess fabric because I felt I would need something to hold on to when I appliqued the Hexie Crown onto the block.  LuAnn had posted that she had an issue with the fabric not laying flat so I tried to think of a way to stabilize the center of the block.  I cut a large circle of freezer paper and pressed on the back side of the fabric.  I thought that it would be large enough, but I still had about an inch or so that was not supported when I appliqued the crown and I had to be very careful in that process.   I also had some problems in sewing the hexies together in the right place.  Here is my first block:

Block 1 of Brinton Hall Medallion

Of course, if you have read my Blog before you know that I am the “Ripper Queen of Quilting” and usually make a test block to make sure that problems do not arise.  Before I started this project, I read Diane’s book (well part of it) and studied Karen’s method to fussy cut the 10 1/2″ blocks for the Medallion and the placement of the Hexie Crowns  (check out the tutorial http://faeriesandfibres.blogspot.ca/2015/06/brinton-hall-start-and-little-tutorial.html) .  In making the template,  I counted  the number of hexie’s that Karen had used in her picture; placed them accordingly; and taped them together with “non-stick” tape that is used for paper piecing.  Then I drew around that group of hexies on heavy drawing paper to make my template to fussy cut the Medallion Center blocks.

Fussy Cut Template For Centers

This morning I started on Block 2 – I sewed 18 gold hexies and tried to think of a better way to put the crown together and to stabilize the block when appliquing the Crown.  I traced the template onto freezer paper (same size as the fussy cut block) cut it out and turned the block over and realized that I had another problem with my idea – it is called “no lines to follow” – PLACEMENT STUPID!  So I ran a basting thread along the lines on the front of the block which provided me a line to follow when placing the hexies and appliquing them to the 10 1/2″ block AND provide guidelines for pressing my freezer paper stabilizer to the back of the block.  I did have to  cut 1/4″ off my freezer paper template because it would have been in the way of my applique!  Here are some visuals in case my verbage has you off in never-never land!

Freezer Paper to Stabalize  Block Back
Freezer Paper to stabilize Block Back


Top Basting Stitches
Top Basting Stitches Using the Template Markings
Block back with FP Template and Basting Stitches for Guides
Block back with Freezer Paper Template and Basting Stitches for Guides
Front of Block with Basting for Guides for the Crown-
Front of Block with Basting for Guides for the Crown
Block 2 Brinton Hall Setting Sample

One of the problems I encountered yesterday when working on the Hexie Crown, was “placement” of the hexies.  I kept having to look at the pattern to make sure I was sewing the accurately.  By doing the basting thread on the lines I originally drew from Karen’s template idea, and pinning each hexie to its appropriate position, and using the clips I will be able to complete the Crowns much faster.  NOW remember I am new to this so many of you probably already know these secrets…. if not, then I hope it helps another newbie to this technique.   Clear as mud – right?

Have a great week – and enjoy your work.  EPP is so relaxing – just as much as embroidery!


Doing the Same Thing Over – Expecting Different Results!

Well, here it is 13 July 2014………..The time flies when one is having so much fun.  The weather is definitely Summer Time in the South!  We reached 99 degrees and 50% humidity yesterday – Lovely.  This is a good time to stay indoors and work on quilt projects – just like the Cold Winters in the North!

If you follow my Blog you know that I had been working on a Quilt called Enduring Love #270 using Judi Rothermel fabrics from Old Sturbridge Collection called Enduring Legacy.  Being a Type A Perfectionist and OK – Compulsive Obsessive Quilter, this project was doomed from the beginning – I just did not realize it!  After working on it on and off since late April, stopping at one point and redoing the entire quilt, I arrived at the border of 6″ Stars.

I will not bore all with my lovely trip through the vicissitudes of the life of a perfectionist quilter, so here is the bottom line.  Because I am chemically sensitive, all fabric is washed before bring it to the Studio.  I NEVER once thought that by washing this fabric some of the dyed pieces would have faded and that the fabric would have stretching issues.

All I will say is that the left over fabric (and there is a lot) is put up so high on my shelves that I doubt I will ever see it again – maybe the dust will cause it to disintegrate someday and I will never have to “make myself use it”.  Maybe I will give it to a quilter who needs some frustration in their lives!  (LOL) Once the fabric is washed it turned into a thinner more stretchy fabric that I did not realize UNTIL I had made 36 – 6 inch stars for the next to the last border…….So here is what I came up with and I am not pleased with it at all.  Without the Stars, the quilt does nothing for me and I am sure a Judge would run past it, therefore it is going to be a utility quilt.  I think that if anyone has purchased this line of fabric and pre-washes  they will have a mess on their hands.  The fabric fades and becomes very thin and stretchy – a lot of work that will be in vain because the quilt will not last.   Now needless to say, there were some errors I had made when making the quilt, but when I say it was doomed from the beginning it was and it was due to the pre-washing.  Learned a BIG lesson on this one.  (I wonder if I will ever get over the time I have lost in devoting to this quilt?)

Enduring Love #270
Enduring Love #270 – Modified

Now on to more positive things.  I have completed my Stars Across Texas embroidery project – I have decided to wait awhile before I design a setting.  There is something to say about hand work and that is,  “one can control the outcome”!

Texas Wreath
Texas Wreath


Texas Armadilla
A Texas Armadilla

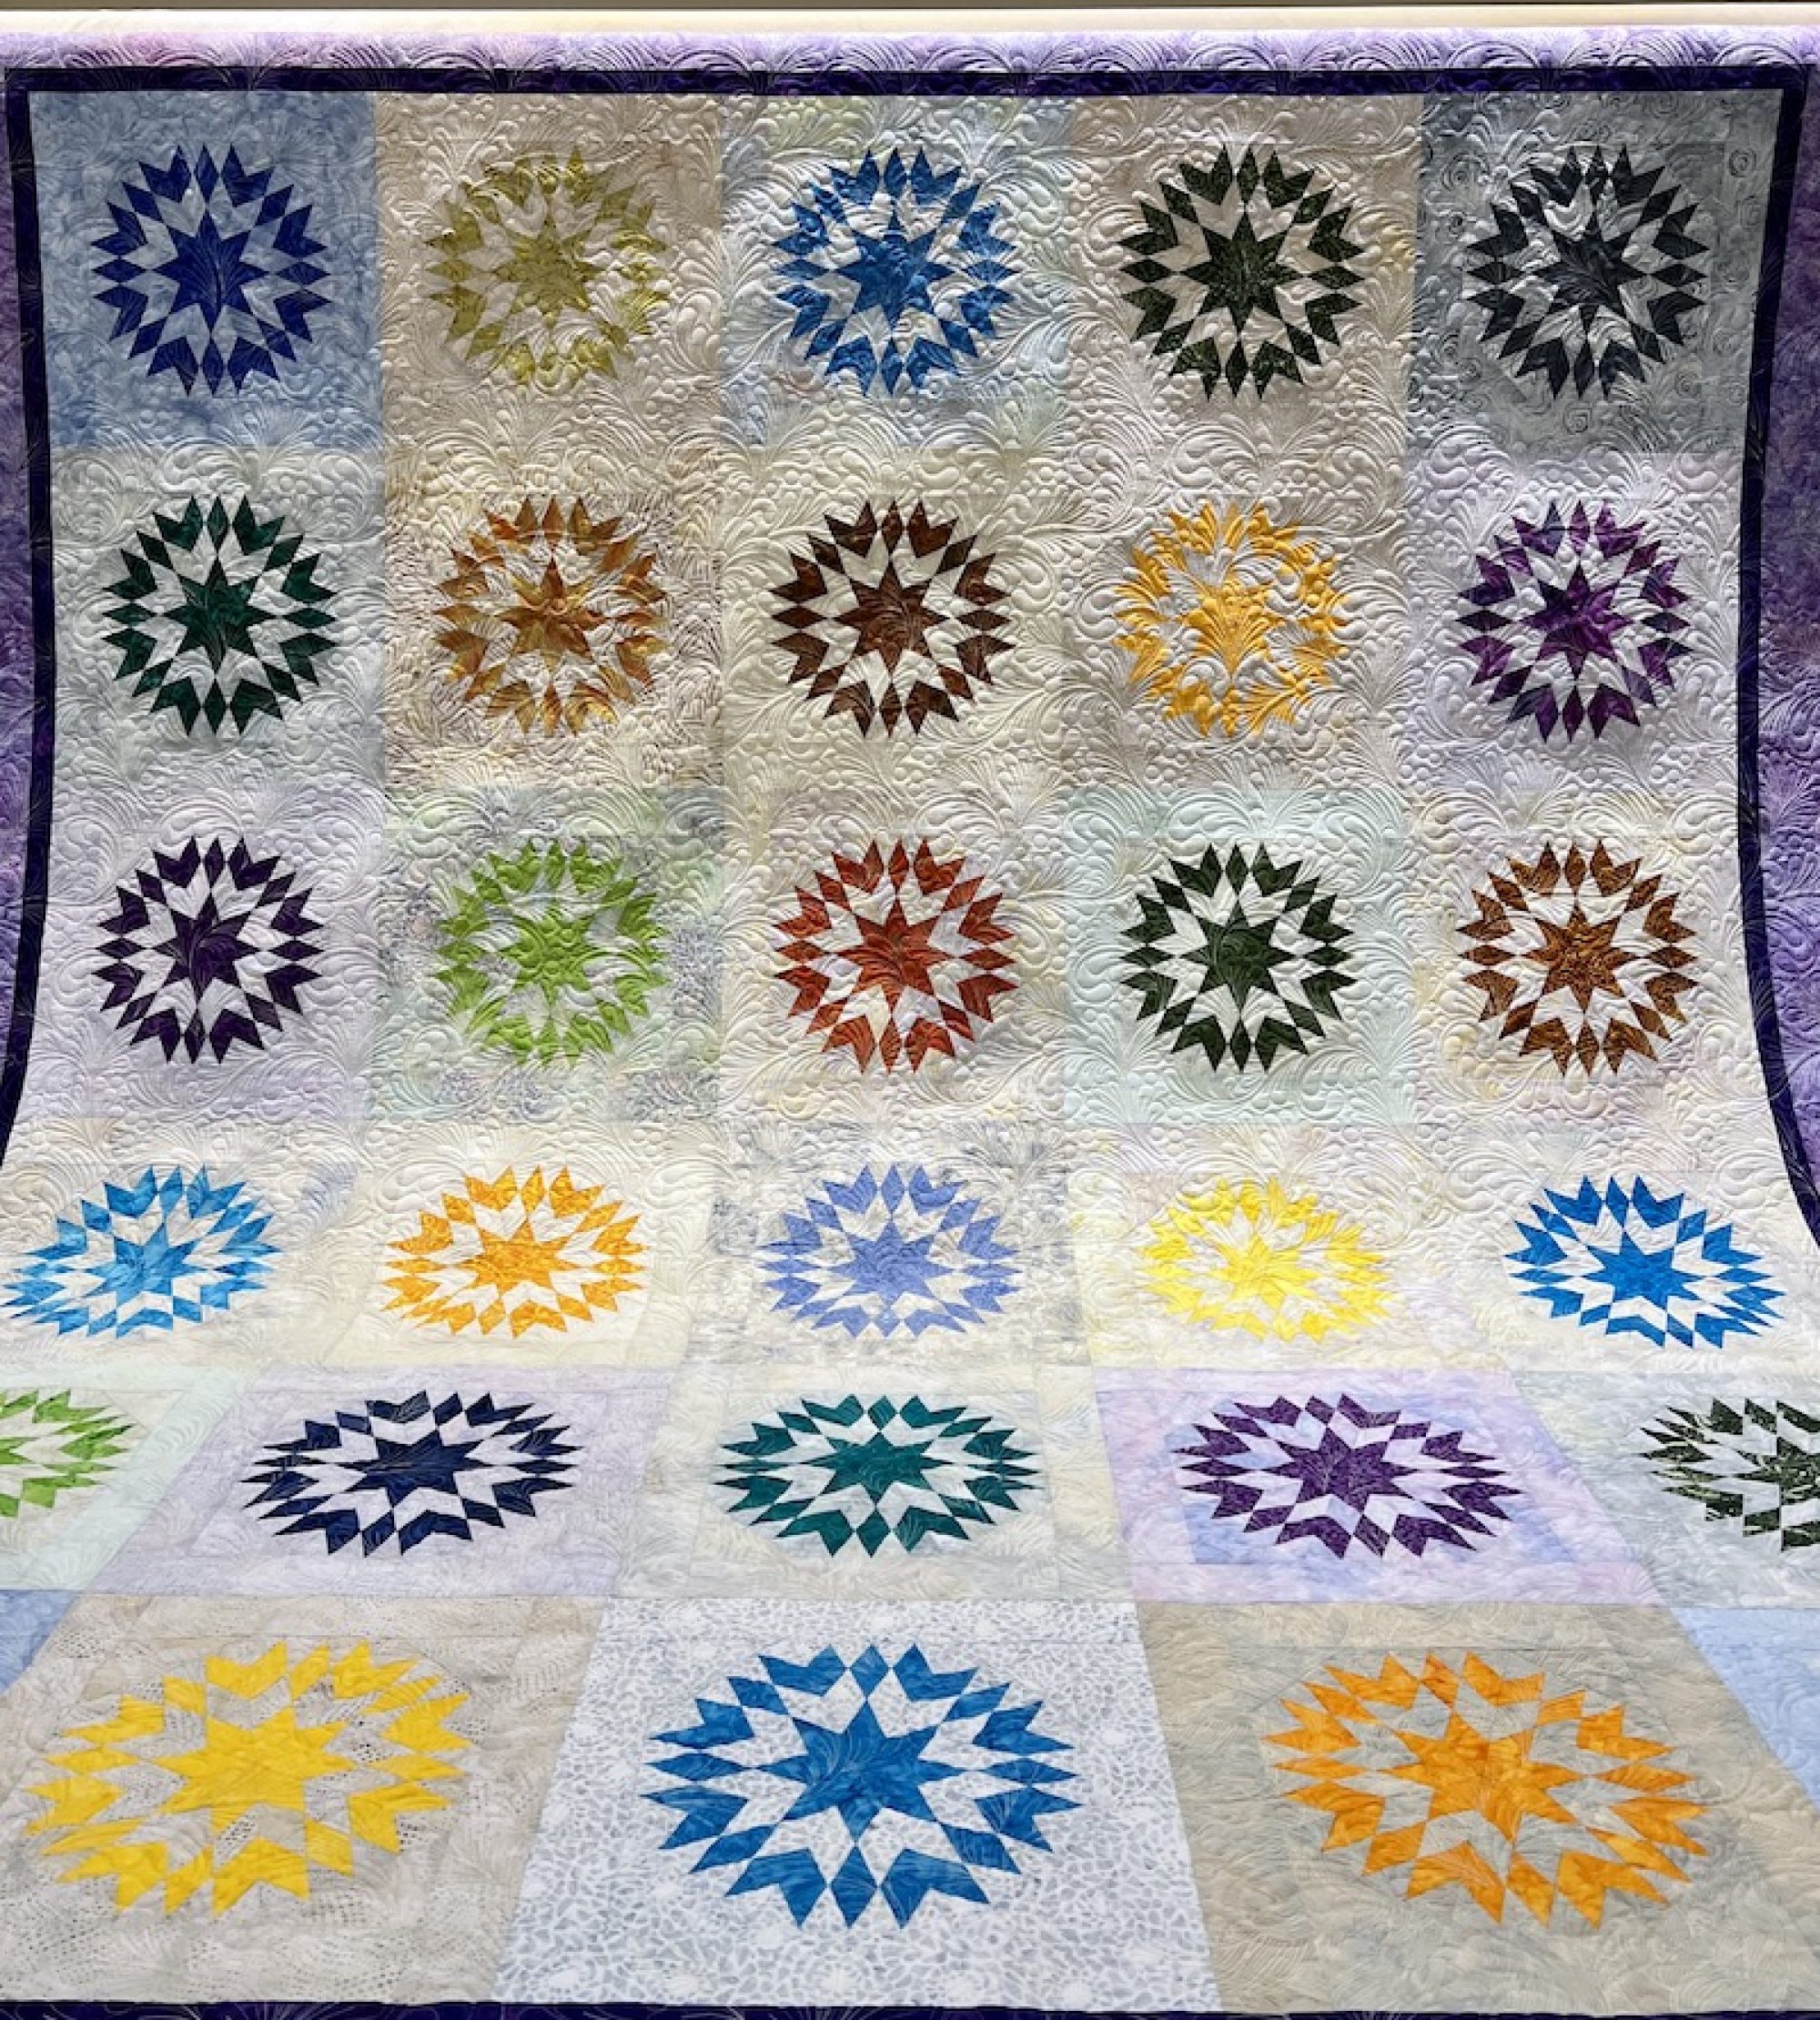
Last year I became interested in Reproduction fabric and Australian quilts.   The Australian quilters love English Paper Piecing (EPP) and their quilts really pop and look great.  There is a lot of intense hand work in  their patterns and sooooo challenging!  I cancelled all of my US magazines and only subscribe to Quiltmania.   LuAnn of luannsloosethreads.blogspot.com blogged about a quilt that she was starting that is in Quiltmania Magazine Number 107.  Be sure to go to her Blog – she does some great work.   Here is a picture of the quilt called Brinton Hall by Leigh Latimore (http://leighquilts.blogspot.com)  Check out her Blog also.

Brinton Hall Quilt
Brinton Hall Quilt

I immediately knew that this would be my next project.  So off to the Stash to pull fabrics.  I am working on the Center Medallion now doing the EPP rings around a “fussy” cut Center.  I have missed working with my batiks this last year so I will be using them in this quilt.  Hopefully it will not be a disaster.

LuAnn also blogged about a book that is absolutely great when developing an in-depth understanding of EPP.  The book is called “all points patchwork” – English Paper Piecing Beyond the Hexagon for Quilts and Small Projects by Diane Gilleland.  Amazon has it on their website for about $12.00.  There are 220 pages of illustrations of “the many ways to use EPP as possible”.  (a direct quote from her Idea Book versus Project Book).  It is a great book!

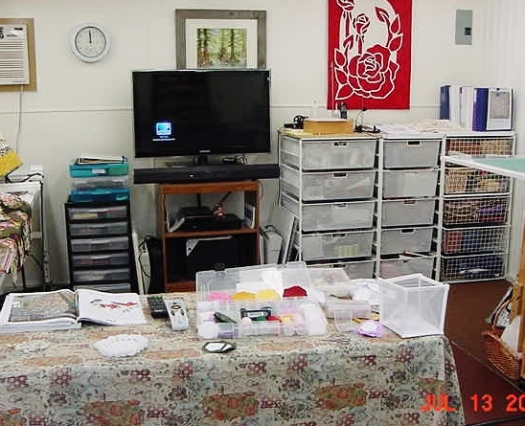
I love the Blogging world – quilters share so many ideas and projects and they are all inspiring.  So with that, I am now going to go and work on EPP Hexagons.  I have covered up the sewing machine for at least 2 weeks and will be sitting here working on EPP watching some movies and resting my weary mind from the last quilt project that I want to forget.  Doesn’t this look inviting?

EPP Set up
My EPP Sewing Table and a TV – What more do I want?

Have a wonderful week, enjoy life, and always take time to take in some Sun (good Vitamin D).