Happy March! Winter is evidently going to hang around a little long this year! I love the cold weather so I will enjoy the next week and I do hope that hot weather does not come early. We are in another drought and really need some heavy rains to catch up. My friend Gretchen reminded me that in a week we will be on DST – UGH! Not my favorite thing at all!
I am back to normal and thankful for it! I still cannot figure out how or why this episode came about! Thank all for the concerns. But it is over and I finished my first Feathered Star block.
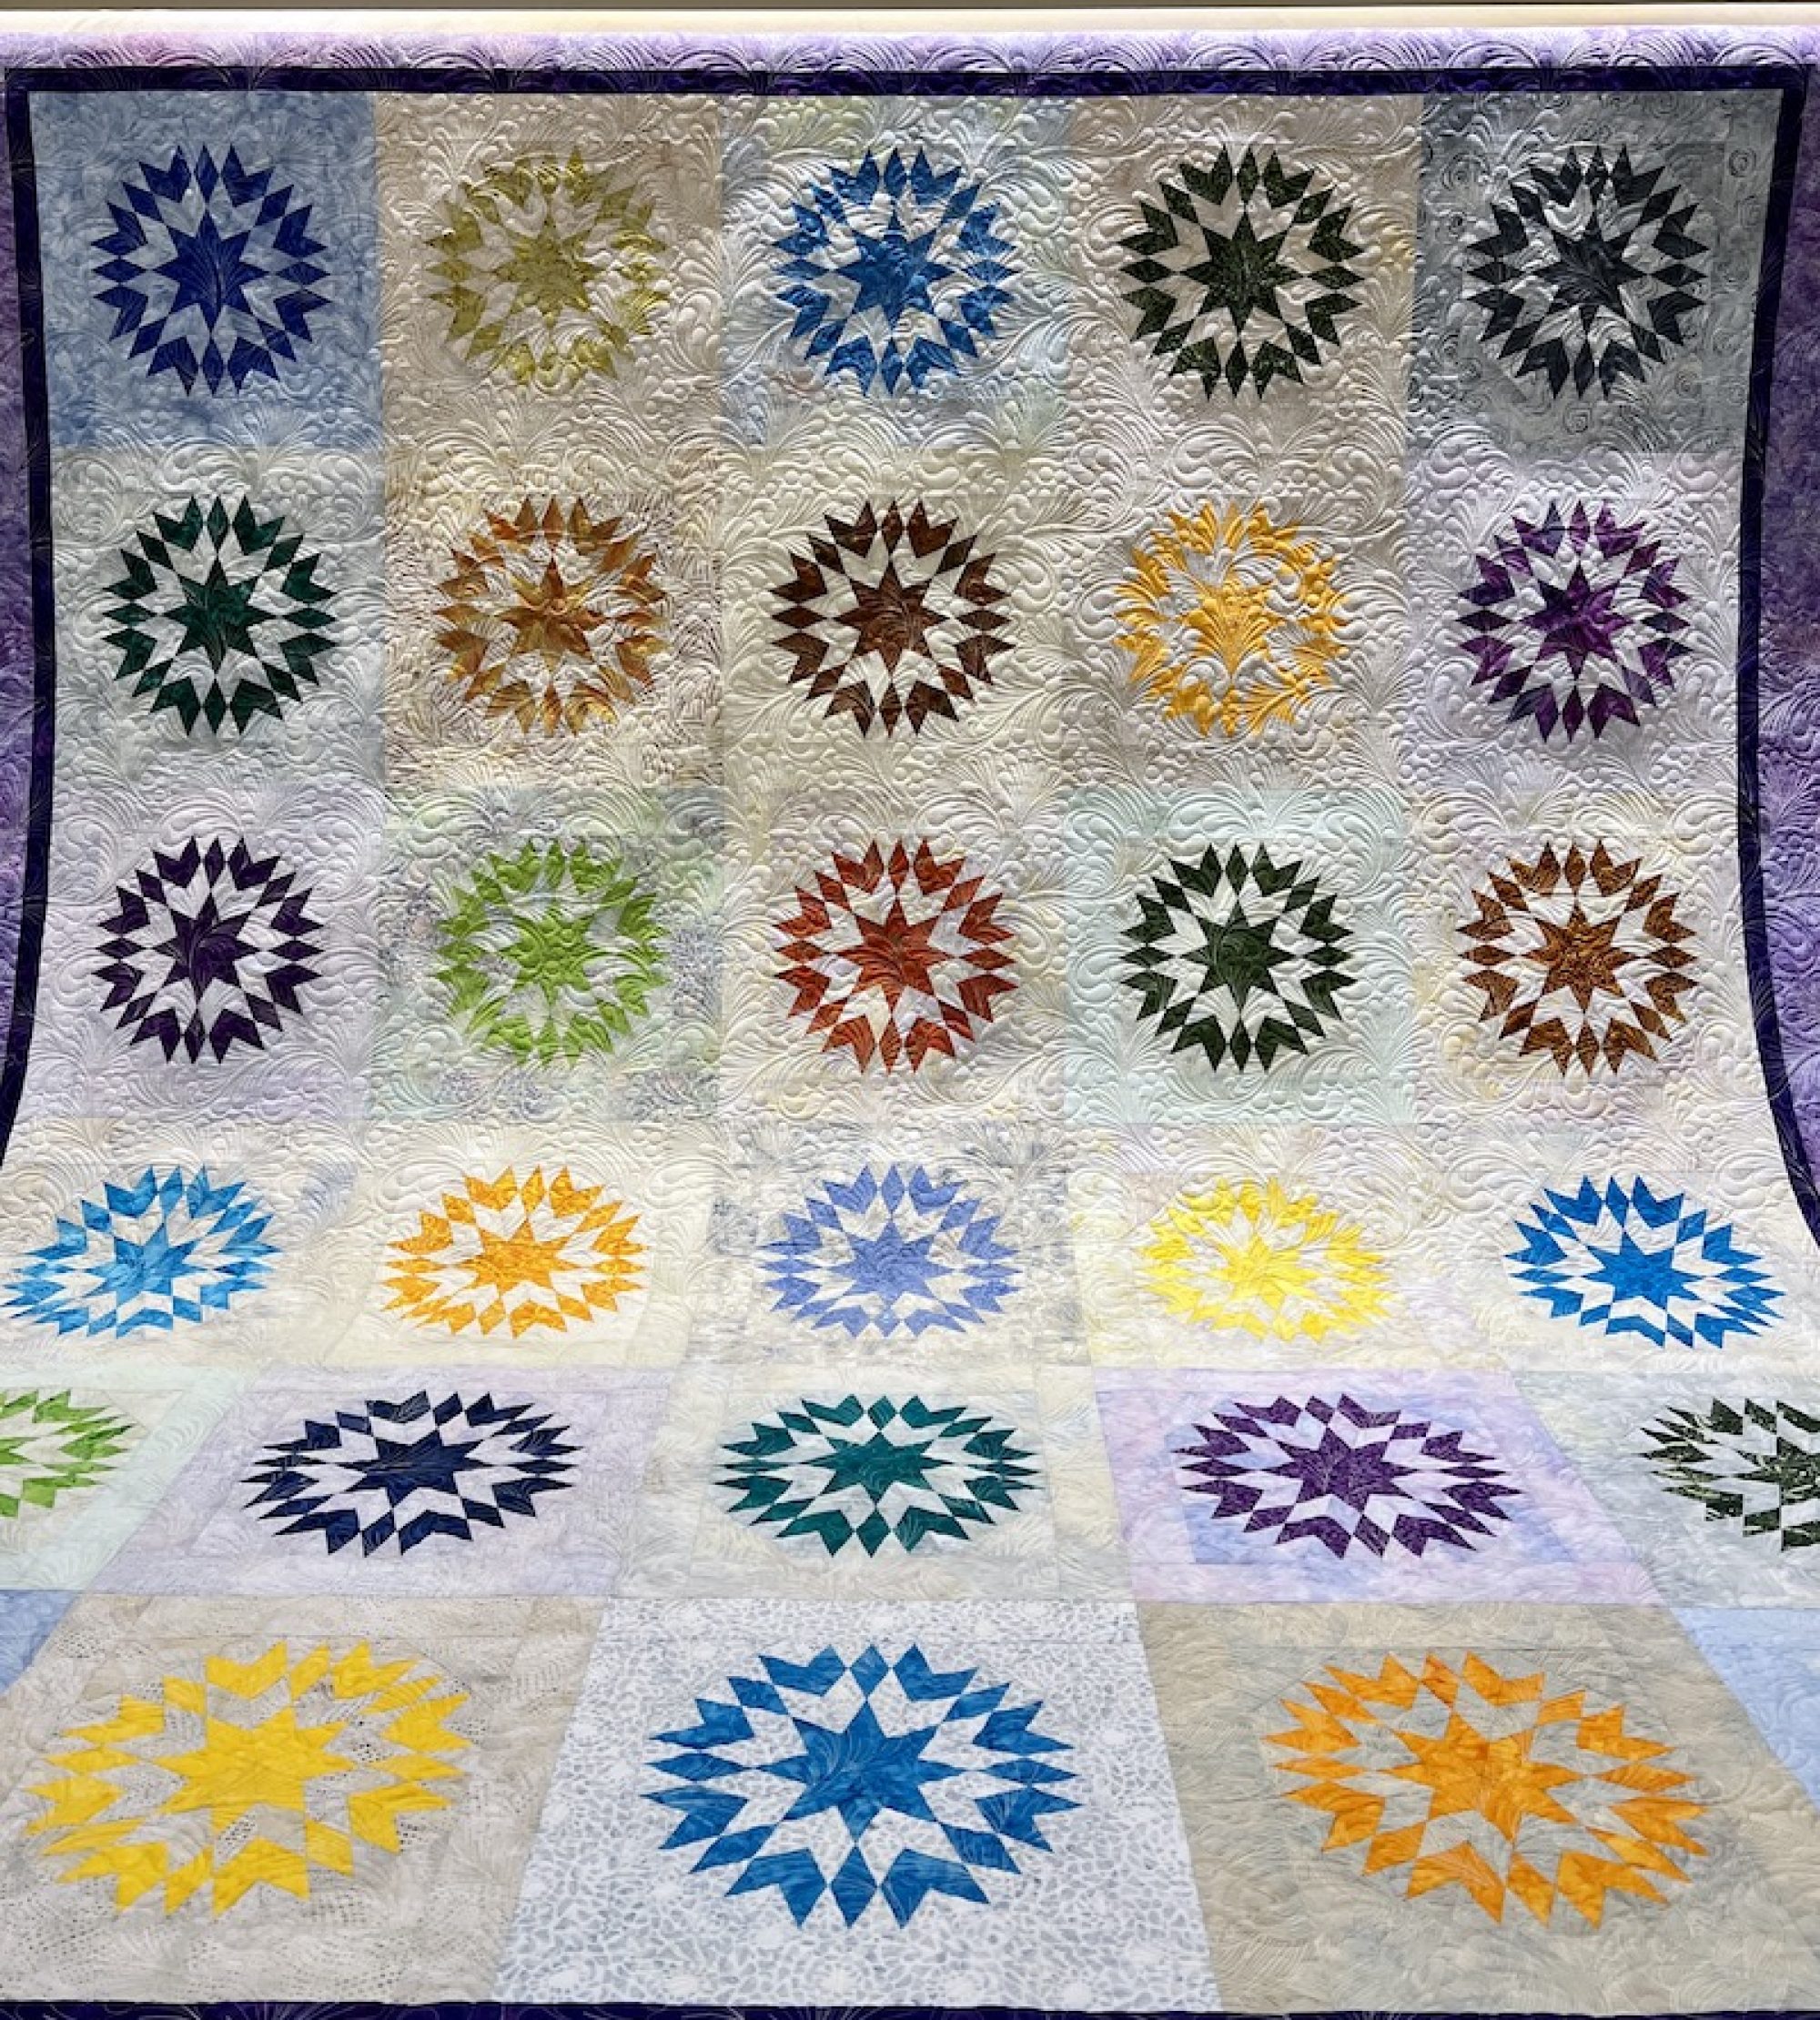
I am making the Star of Chamblie by Marsha McCloskey. The instructions are complex and this quilt will be a great challenge project. Marsha uses cuts such as 1 9/16″ and 1 15/16″ so if one is not familiar with a tape measure there could be a big “WHAT” when cutting the pieces. I have used a 1/16″ extra cut on some things, but when I bought the book I also purchased her special Feathered Star Ruler that has the extra 1/16″ indicated. In 2013 I made a Radiant Star from one of her books but that was 6 years ago and who remembers those instructions! Now having made a second star using her method, the remaining will be much easier (Really Nanette?). It appears that her philosophy is that whatever size your block turns out to be is fine. As long as I am precise in the cutting and labeling and studying the directions I will be fine. I do believe it will be easier than York Lodge.
Marsha uses the bias strip piecing method to make the 1 1/2″ HSTs and this process yields absolutely perfect HSTs. I had purchased the fat quarters for the background from her fabric collection in 2013. I have ordered some additional fabrics to complete this project.
Here are some pictures of the process I went through to understand and make sure that my block would turn out accurate.


Decision Point – Which Center to use!


I am going to enjoy making this quilt! It is challenging, rewarding, and learning new techniques. There are parallelograms, HSTs, accurate piecing, points, and a very accurate 1/4″ seam allowance involved in making a Feathered Star! More learning!
Have a great Sunday
Nanette
Linking To: My Quilt Infatuation; Confessions of a Fabric Addict; Finished or Not Friday ; Sew Can She; Em’s Scrap Bag; BOM’s Away; Fiber Tuesday; Sew, Stitch, Snap, SHOW; Sew Fresh Quilts; Crazy Mom Quilts; Oh Scrap; Scrap Happy Saturday; Show and Tell Monday with Bambi; Quilt Fabrication

What a beautiful block. This one has been on my bucket list. Hugs
LikeLike
Thank you Cathy. If you use Marsha’s I recommend that you buy all 3 books of hers on Feathered Stars. I have all 3, but like a dummy I did not go back and read the detail on how she writes her patterns……….DUH – I learned the hard way, but I now understand her mind set – I followed it to a “T” and my block came out perfect! YEA
LikeLike
Your work is always so beautiful, I love your fabrics
LikeLike
Thank you Ms “A” I appreciate your nice words.
LikeLike
I also love reading your blog,
Rosemary
LikeLike
Hello, I saw your star over on Kathy’s slow stitching site. I love your star, and progress pics. I’ve wondered about her hst method, and never tried it because I thought it used up too much fabric compared to using triangles on a roll. Perhaps I should try it. 🙂
LikeLike
There is another book on that technique, but I cannot place it now. It really is fool proof, a little time consuming. I will look to see if it is on google and put the link in a reply! I had no waste because the remaining pieces were cut at 2″ for the saw tooth border that is to come…sometime! LOL Thank you for the nice comment!
Here is Fons and Porter BUT I did not mix and match the ones I made. Additionally, I used the 12″ and cut them at 2″ strips to yield the 1 1/2″ HSTs!
Have fun!
LikeLike
Why thank you Rosemary! I would love to blog about each step, but then that takes a lot of sewing time away! Have a great day! Hugs
LikeLike
Wow! I am not up to that one! This will be a beautiful quilt though. Glad you are feeling better!
LikeLike
Oh Kathy you know by now I am just NUTS! But I do want to challenge my mind and stay away from the Big “A”. I am so glad that is over with. I THINK it was the 8 allergens that hit on Wednesday might have brought it on! Hugs
LikeLiked by 1 person
What a challenge and beautifully executed! I will enjoy seeing more of your feathered stars. Your choice of fabrics are lovely.
Driftwood, TX
LikeLike
Thank you Susan! The blue is Moda Marble Mates (no longer made) and Marsha’s fabrics for the background. They are luscious to work with – so soft! How is Driftwood? La Vernia is a little on the overcast and now 48! I dressed with sweat pants and when I was vacuuming they came off and a T-Shirt and cotton slacks came out – forget those hot clothes for me today! LOL
LikeLike
Wow! Just WOW!
LikeLike
OH Thank you Laura!!!! Great compliment from you! Can you come over and cut out these tiny pieces with a 1 15/16 and maybe a 1 5/16’s? LOL…. Talk about a Math refresher course!
LikeLike
Wow! Complex measurements which would definitely be a “NO” for me!
And so many tiny pieces for hand stitching! Good for you to keep at it!
LikeLike
OH NO – these are pieced! I do not do hand piecing – Machine! Now applique – only needle turn applique without glue! Thank you for the nice compliment!
LikeLike
Such a fantastic pattern. It reminds me of a snowflake. Love the choice of fabric for this too. Love watching your projects come together…your work is beautiful ~ Sharon
LikeLike
Thank you Sharion, that is so sweet! I am using Marsha’s fabric for the background and they are so light and airy! Again thank you for the nice comments!
LikeLike
Absolutely perfect!! What a beautiful block!
LikeLike
Thank you Jane. I followed those detailed instructions and it came out perfect. Of course it takes time to do this precision type of block as you well know! I wish I could get the 9 blocks finished in 2 weeks, but then I am the constant dreamer setting those pie in the sky deadlines!!
LikeLike
This feathered star block is beautiful. It is nice to see that even you have to fix points sometimes. I always get frustrated with myself, but it usually works out in the end after some seam ripping.
LikeLike
Oh Cathie…I rip a lot sometimes. I really had to do some studying on this as to why only one star point on the outside did not come together correctly, but I found it – worth the time! The Ever Type A here! Talk about frustration…figuring out that 1 5/16’s is really 1 1/4″ + 1/16″ LOL
Where is that Calculus book when one needs it! LOL
LikeLike
Oh, this is so beautiful! A gob of tools all right for the job. One day I will tackle one of these beauties. In the meantime I will enjoy all the pictorals I can!
LikeLike
Thank you for the lovely comment. Yes, those tools really help! You can do it, but do not hurry on the first one – there is a process and it works, albeit driving one nuts doing so! LOL
LikeLiked by 1 person
I love your fabrics! This isn’t a pattern to rush through. You’re going to have some beauties when you are finished!
LikeLike
Thank you Gretchen! Marsha’s fabrics are soft like In The Beginning line! It is a slow process until one understands where they are going! LOL
LikeLike
Your quilt is going to be gorgeous, and so much fun to make. Feathered star is my favorite block, and I will watch your progress eagerly. I made a feathered star quilt as a beginner, before I understood that points shouldn’t be chopped off in seams, and I will make another one sometime. I wonder, though, why Marsha McCloskey makes the hst with that method – I saw her demonstrate the method on The Quilt Show, and it seemed unnecessarily fiddley to me. I sew hst, then trim them down to the correct size to get perfect hst. Do you know if there’s a particular reason to use her method? Happy sewing!!!
LikeLike
I always sew my HSTs the old way – cut squares, cut diagionally, sew together! The one thing about using this technique is there is no distortion, to seam problems, and I did not have to redo any of them!!! I would not use this technique on other quilts, unless it is OMIGOSH! and I have not gotten there yet on that project! Have a great day and try another one, time consuming and detailed, but so pretty!
LikeLike
You should be pleased – that is one lovely block! Your fabric choices really make the star pop
LikeLike
I am Susan. Thank you. It a new thing for me to use the fabrics I am – but seems to be coming out OK! Hugs
LikeLike